Cool Artictic Hand Drawings in Color
How to Describe a 3D Hand
Today yous'll learn the 5 simple steps that volition teach you how to make a 3D hand drawing. This project is a fun way to kickoff learning to make Optical Art (Op Art). And the consequence is a cool looking optical illusion that gives the impression that the hand is popping off the paper. And drawing op art hands is super fun and easy.
But the best function about it is that it is actually like shooting fish in a barrel to do. I mean what tin be easier than tracing your hand!
Once yous've learned the technique to creating this type of optical illusion, you can utilise it to any subject. You won't be express to just drawing hands.
History of Op Art
Optical Art, ameliorate known as Op Art, is an abstract style of fine art that creates an optical illusion. The fine art movement became popular in the 1960'southward by Bridget Riley and Victor Vasarely. They used patterns and colors to disorient the viewer.
Vasarely is ofttimes referred to as the grandfather of the op art movement. In the 1930's he started out as a graphic designer, after leaving medical school. In he 1940's he experimented with surrealism and abstruse expressionism. The primeval example of op art is "Zebra" (1937).
His goal was to create a universal linguistic communication through fine art. This was done through op fine art, a geometric abstraction.
* Some of the links in this post may be affiliate links. This means I receive small commissions for purchases fabricated through these links at no extra cost to y'all.
Art Supplies
- Paper or cardstock
- Pencil
- Kneaded eraser
- Colored pencils or Markers
- Thin black marking
3 Simple Steps to Creating Better Art (freebie)
How to Depict a 3D Optical Illusion of Your Mitt
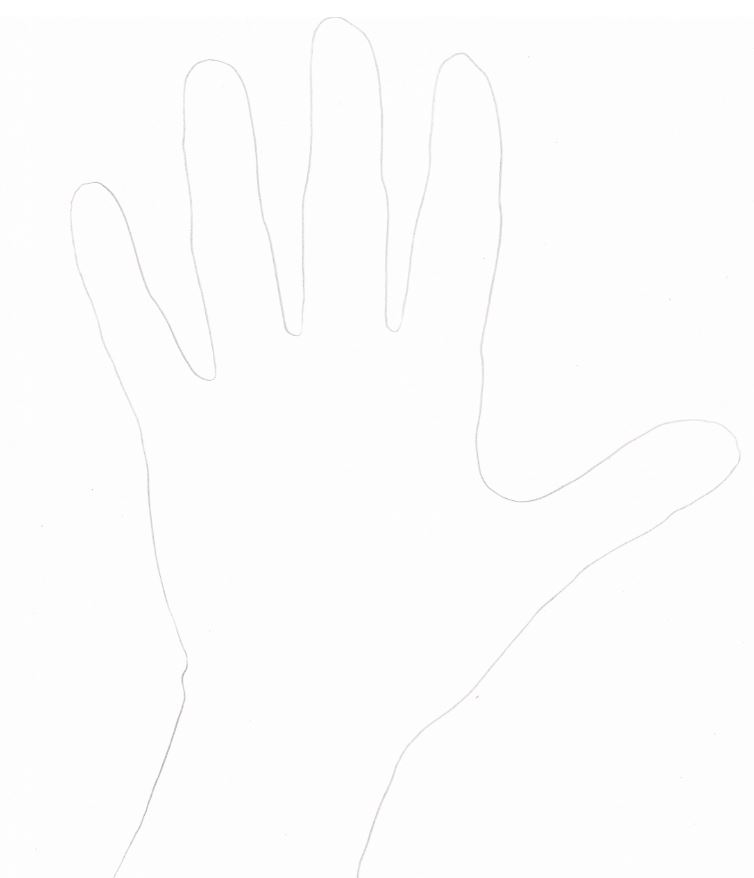
Stride 1 – Trace Your Mitt
Lightly trace your hand using a pencil. You do non want the original outline of your hand to show when finished so trace every bit lightly as possible. When y'all are tracing around your fingers make sure you are not making them as well thin.
If your fingers are too sparse it will get in more difficult to add your lines in the adjacent step. This is a common struggle when tracing hands. Continue your pencil directly up and down to get a meliorate tracing of your hand.
You could also brand a template of your hand and shrink information technology down for smaller drawings. In that location are examples of this towards the end of the post.
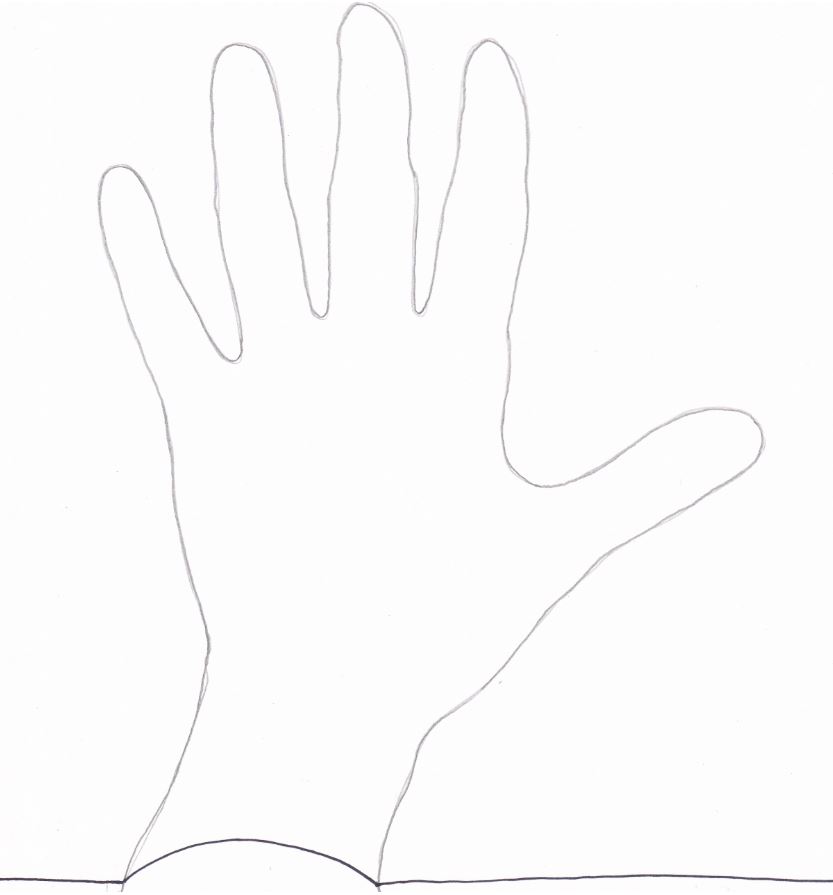
Step 2 – Curved Lines
Begin adding your lines with a thin black sharpie or other type of sparse marker. It seems to be easiest to start at the bottom of the folio. Begin where your arm is and draw a curved line on the arm then straight lines for the groundwork.
It may be easier to beginning by using a pencil for the first 4 or five lines until you get the hang of it, and so using the marker to add the rest. Only if you feel confidant go ahead and utilise the blackness marking right from the commencement.
Tips:
- Brand sure your straight lines for the background meet where the curved lines of the arm and hands are
- Do not trace your outline of your hand and arm with the blackness mark
- If there is too much space between your lines information technology will non expect like the hand is popping off the page. Exist certain to identify your lines fairly shut together
3D Mitt Drawing Optical Illusion
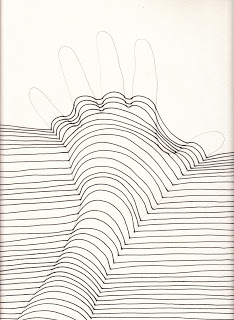
Stride 3 – Curved Lines
Continue calculation lines and moving upward the paper towards the top of the page. When doing the fingers I found it was easier to curve your lines in the opposite direction instead of trying to add together directly lines there.
If you look at the example below, the lines in the fingers curve up and the lines in betwixt the fingers curve down.
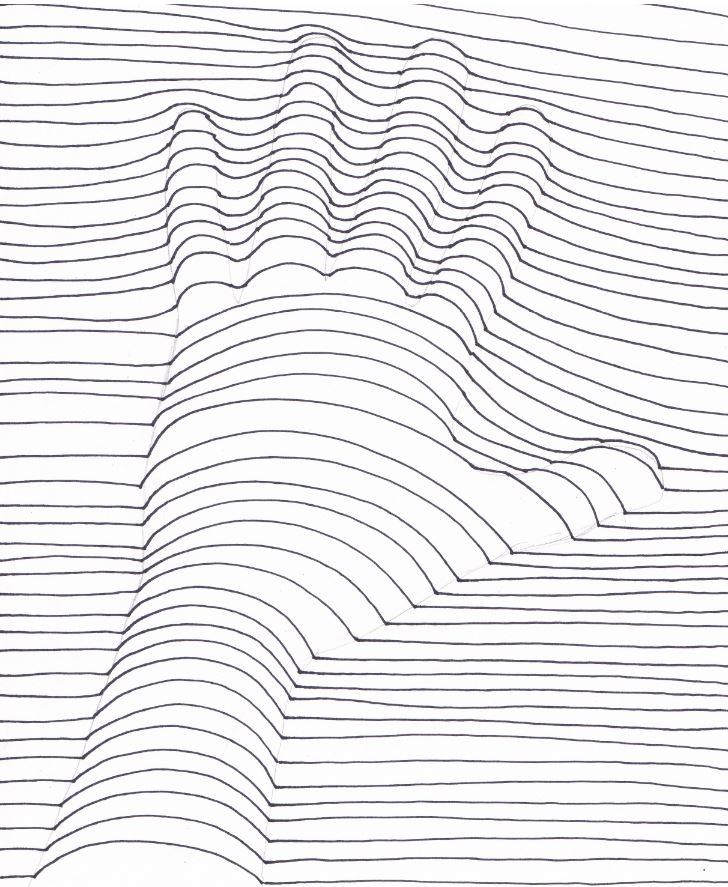
Pace 4 – Finishing the Optical Illusion
The about difficult function of this project is ending the fingers. Information technology's a bit of a struggle to find a way to get back to straight lines at the tiptop once yous go past the finger tips.
You don't want the curves at the top of the page to exactly match the curves on and effectually your fingers. Try to flatten out your lines every bit much every bit possible so information technology won't look like your fingers keep by the point where they should end.
3D Paw Drawing & Color Theory
Earlier adding color to your optical fine art 3d hand drawing, you need to decide on a colour scheme. Or if you even want to use a color scheme at all for that matter.
This is an piece of cake projection to practice using colour theory. Information technology'southward expert to get into the habit of using color schemes in your artwork. Even when it'south not a critical part of the final drawing.
Some proficient options for this op art hand projects are:
- Warm Colors
- Cool Colors
- Coordinating Colors
- Monochromatic Colors
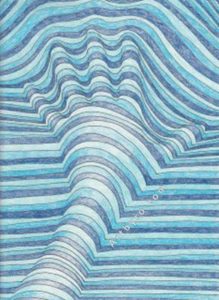
Monochromatic 3D Hand Drawing
Stride 5 – Add Color
Choose iii colors, using a color scheme, and color between your blackness lines with colored pencils. A monochromatic color scheme was used for this example.
Utilise a pattern with your colors when filling in your op art mitt. This was washed by using the darkest blue, the middle blue, and the light blue. So repeating that pattern of colors.
Gradating colors will aid your hand popular off the page. Apply your color darker at the edges of your fingers and paw. And make your colors lighter at the highest signal of your paw drawing.
You can use a kneaded eraser to lift some of the color off the ridges of the fingers, hand, and arm.
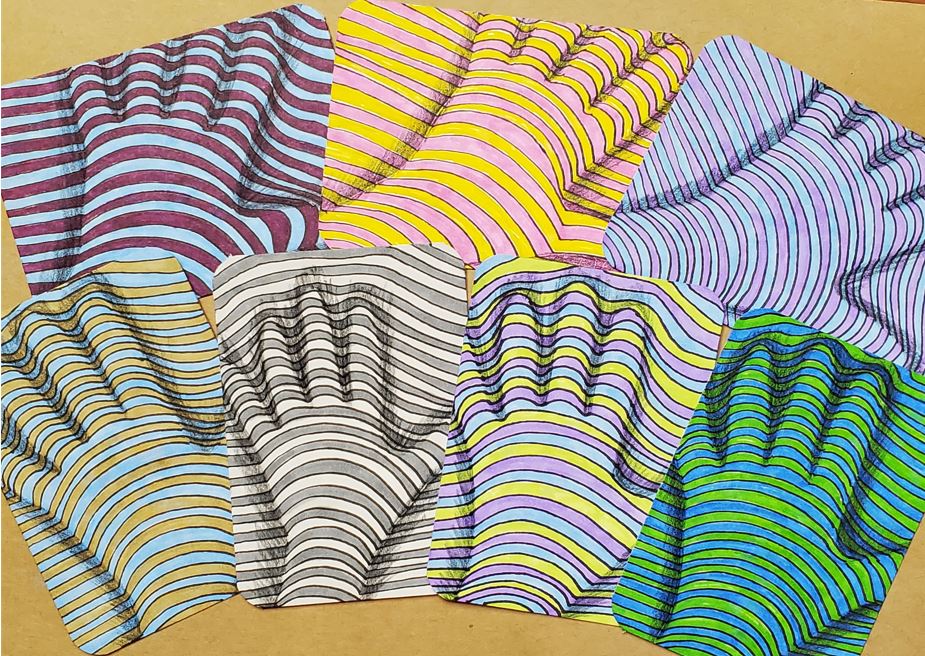
Op Fine art Mitt Drawings Ideas
Don't be afraid to experiment and endeavour out some different ideas. You tin can endeavour various colour combinations, change up the placement of your hand on the paper, or anything else you want to try doing.
Artist Trading Cards (ATCs) are a great way to save time and get more drawings done in less fourth dimension. This makes it so much easier to endeavor new things. Below are some drawings made on ATCs with markers, then a black colored pencil was used to add together some shading around the edges.
3D Manus Drawing (Op Fine art Tutorial)
I promise yous enjoyed this op art tutorial for 3D mitt drawings. These are fun to make and much easier than they look. They tin be completed with markers, colored pencils, or only using a graphite pencil.
Download our FREE Guide to Creating Better Art
Posts Related to Op Art Easily
- Color Theory for Artists
- seven Like shooting fish in a barrel Op Art Drawings Anyone Tin can Exercise
- Op Art Tubes
- 3D Stairs Optical Illusion

Roshanda is an art education blogger who is on a mission to coach and encourage every bit many aspiring artists as possible through the employ of her blog. Acquire more near her on the Nigh Me page and connect with her on Facebook, Twitter, and Instagram.
Source: https://artbyro.com/drawing-op-art-hands/
0 Response to "Cool Artictic Hand Drawings in Color"
Enviar um comentário